Whenever you jailbreak or update your iPhone & something goes wrong, you need a way to get your device back in a working state. DFU (Device Firmware Update) mode is just what you need!
Consider it a nuclear option when nothing else works — this is most certainly the last resort approach. Any iPhone, iPad, or iPod touch can be fixed using DFU mode; however, the procedures for doing so could differ slightly based on your device model.
What is DFU mode?
DFU mode is a way to recover iOS devices from both software & firmware problems you experience. For example- during an update or jailbreaking.
But How Can You Use It To Fix An Apple Device?
DFU mode lets you connect an unusable device to iTunes on Windows or Finder on Mac. This is necessary to restore your gadget. You can use this process to revive any iPhone, iPad, or iPod touch regardless of its current condition.
It is tricky to get into DFU mode and demands precise timing. Depending on what type of apple device you have, the process to follow will be ever-so-slightly different. Nonetheless, you will likely need to troubleshoot a few times until you successfully get it right.
However, here’s a guide on how to do it.
Steps to get into DFU mode:
For iPhone 14 series, iPhone 13 series, iPhone 12 series, iPhone 11 series, iPhone XS series, iPhone X series, iPhone 8 series, iPhone SE (2022), and iPad (with FaceID):
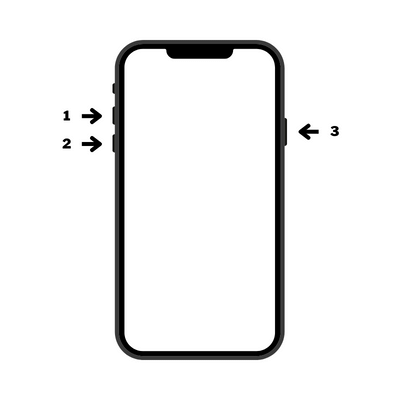
- Open Finder or iTunes to connect your iPhone or iPad to a computer. Then, use a Lightning cable to connect the two devices.
- Once it’s connected, quickly press and release the volume up button, followed by the volume down button.
- After that, press and hold the side button for 10 seconds until the screen turns black.
- Then, hold the volume down button for 5 seconds while also pressing and holding the side button.
- After 5 seconds, release the side button while holding the volume down button for 10 more seconds.
- At this point, if you see the Apple logo appear on the screen, you’ve held the side button for too long and will need to start again.
- If done correctly, you should see a message informing you, “Your iPhone or iPad needs to be restored because it is in an invalid state.”
- To continue, select “Restore” in either iTunes or Finder. Remember that this process could take a while, depending on how much data your device needs to restore.
- Once the process is finished, your iPhone or iPad should be fixed, and you can set it up as new or restore it from a backup.
Remember, though, that this process will erase all data from your device.
For iPhone 7 series and iPod touch 7th Gen:
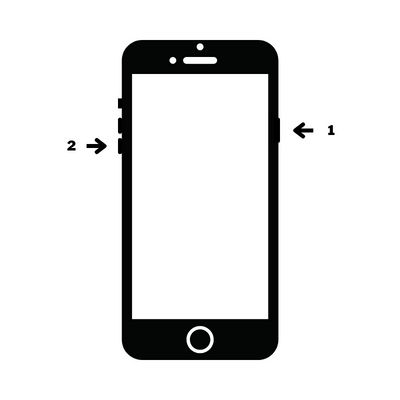
- Open Finder or iTunes to connect your iPhone or iPod to a computer. Then, use a Lightning cable to connect the two devices.
- Once connected, press and hold the power button on the right side(top for iPod touch) for 3 seconds.
- Press & hold the volume down button for 10 seconds while also pressing and holding the power button.
- If you see the Apple logo on the screen, you’ve held the side button too long. You’ll need to start again if you notice it.
- Release the power button while holding the volume down button for 5 more seconds.
- If you follow these steps, you should receive a notice stating, “Your iPhone must be restored because it is in an unusable condition.”
- Click “Restore” in either iTunes or Finder. Depending on how much data needs to be restored, this process may take some time.
- Once the process is finished, your iPhone should be fixed, and you can set it up as new or restore it from a backup.
Remember, though, that this process will erase all data from your device.
For iPhone 6s series, iPhone SE 1st Gen, iPad (with TouchID), and older iPhone models :
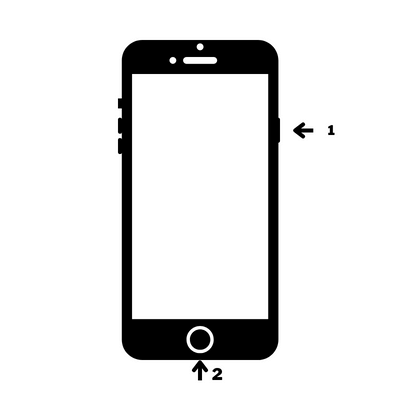
- Open Finder or iTunes to connect your iPhone or iPad to a computer. Then, use a Lightning cable to connect the two devices.
- Once connected, press and hold the power button on the right side (top for iPhone 5s, SE & older models) for 3 seconds.
- Then, press the home button at the front of your phone for 10 seconds while also pressing the power button.
- The Apple logo will appear if you hold them for more than 10 seconds. You’ll have to start over again.
- After 10 seconds, release the power button while holding the home button for 5 more seconds.
- If you follow these steps, you should receive a notice stating, “Your iPhone must be restored because it is in an unusable condition.”
- Click “Restore” in either iTunes or Finder. Depending on how much data needs to be restored, this process may take some time.
- Once the process is finished, your iPhone should be fixed, and you can set it up as new or restore it from a backup.
If you can’t get your device into DFU mode, or if you see the connect to iTunes screen, try these steps:
- Update your iTunes to the latest version.
- Try to force restart your device.
Steps to get out of DFU Mode:
For iPhone 14 series, iPhone 13 series, iPhone 12 series, iPhone 11 series, iPhone XS series, iPhone X series, iPhone 8 series, iPhone SE (2022), and iPad (with FaceID):
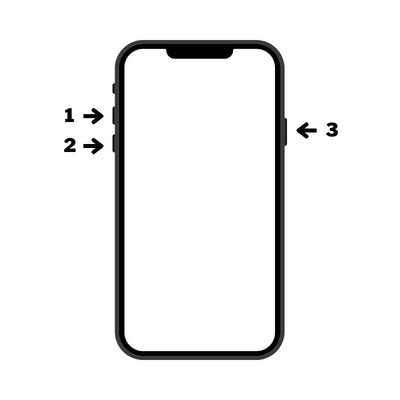
- Press and release the volume up button quickly. Then press and release the volume down button. Finally, press the Side button (power button for iPad) until the Apple logo appears.
For iPhone 7 series and iPod touch 7th Gen:
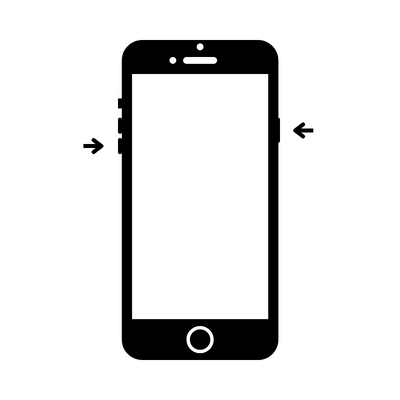
- To restart, press and hold down the Side (power) button and Volume Down button simultaneously until the Apple logo appears.
For iPhone 6s series, iPhone SE 1st Gen, iPad (with TouchID), and older iPhone models :
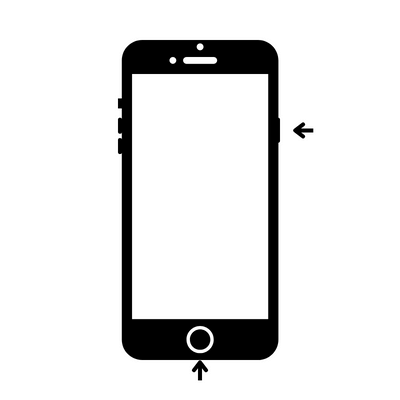
- Hold the Home and Top (or Side) buttons simultaneously for a few seconds. Then, please continue to hold them until the Apple logo appears.
How to use Recovery mode on iOS devices?
For iPhone 14 series, iPhone 13 series, iPhone 12 series, iPhone 11 series, iPhone XS series, iPhone X series, iPhone 8 series, and iPhone SE (2022):

- Press and quickly release the Volume Up button. Then press and release the Volume Down button quickly. Finally, press the Side button until you see the recovery mode screen.
For iPhone 7 series and iPod touch 7th Gen:

- To enter recovery mode, press and hold both the Side and Volume Down buttons. You will know you are in recovery mode when you see the corresponding screen.
For iPhone 6s series, iPhone SE 1st Gen, and older iPhone models :

- To enter recovery mode, press the Home and Power buttons until you see the recovery mode screen.
For iPads without the Home button:

- To enter recovery mode, quickly press and release the volume button closest to the top button. Then, press and release the volume button farthest from the top. Last, long-press the top button until you see the recovery mode screen.
For iPad with the Home button:

- Press and hold the Home and top (or side) buttons at the same time. Keep holding until the recovery mode screen appears.
Once your device is in recovery mode, you can use iTunes to restore its software. This will erase all of the data on your device; however, if you have a recent backup, you’ll be able to restore your information afterward.
After your device has been restored, it will restart, and you should see the “Hello” screen asking you to set up your device — this means the process was successful.
Entering DFU mode on your iPhone can be challenging, but it is possible. Be sure to follow the instructions carefully to avoid any mistakes. Then, if you still can’t get your iPhone working using the above methods, take it to an authorized service provider and get your phone fixed.


